DJI Review: Ronin 4D
DJI’s announcement of the Ronin 4D last year shook things up with features never seen on a cinema camera. It had a full-frame sensor, up to 8K RAW video, one of the first vertical stabilization arms and a LiDAR system that can handle not only focus but gimbal control.
However, things have changed a bit recently. Most crucially, the Ronin 4D is no longer available with Apple ProRes RAW video now that it has gone on sale. Because of that, DJI has also lowered the base price of the 6K model from $7,200 to $6,800.
Ronin 4D

Pros
- Innovative vertical Z-arm stabilizer
- LiDAR autofocus and ActiveTrack Pro
- Good image quality
- Easy operation.
Cons
- Rolling shutter
- Heavy weight.
The Ronin 4D is not without other flaws like excessive weight and rolling shutter, too. Still, there’s nothing else out there that can remotely rival its tech and design. DJI might be best known for drones, but is it actually the most innovative camera company in the world?
Design
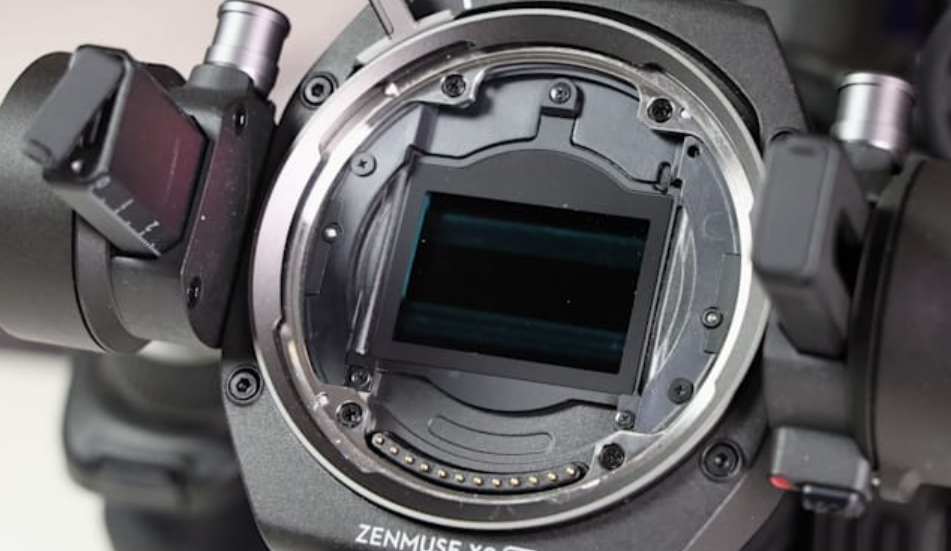
The Ronin 4D is a complex product, so let’s take a look at the features and design. First up the “Zenmuse X9” mirrorless camera designed exclusively for the R4D. I’m testing the 6K version, but DJI plans to release an 8K model later on.
It has a full-frame 24-megapixel sensor and choice of three mounts: DJI’s own DL mount, a Sony E-Mount, and the M-mount used for Leica rangefinder/mirrorless cameras.
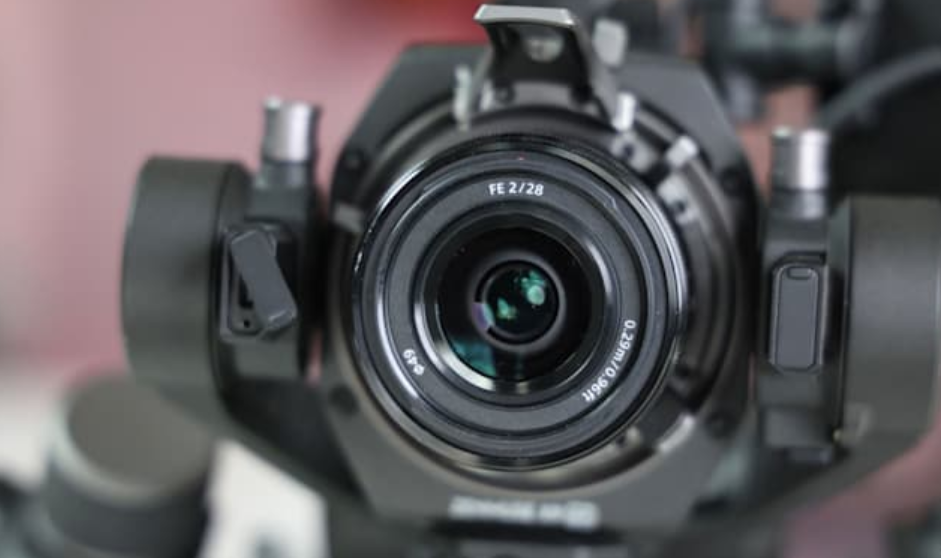
DJI has three native lenses including 24mm, 35mm and 50mm models, all with f/2.8 maximum apertures. They’re all pretty lightweight at 180 grams each as they’re designed for gimbal use, and cost $1,199 each – very expensive for f/2.8 prime lenses.
You can also mount Sony and M-mount glass, but lenses have to be relatively small or you can’t balance them correctly. That’s not a huge limitation as it would be pretty unusual to use a telephoto lens on a gimbal.
Gallery: DJI Ronin 4D review
You can even mount manual lenses and get autofocus via DJI’s optional focus module controlled by the LiDAR system. Finally, it has an incredible nine ND filter levels that give you maximum exposure control. Letting you crank open the iris even in bright sunlight.
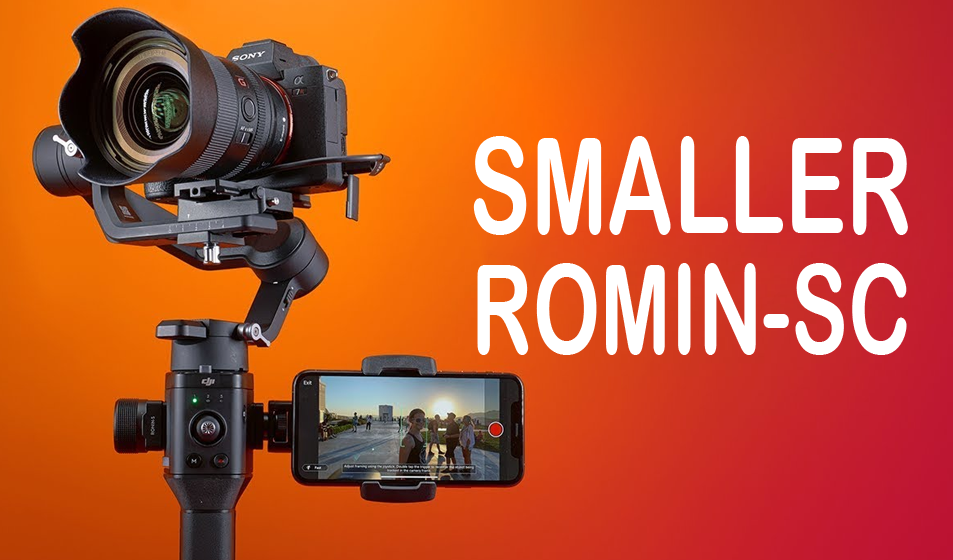
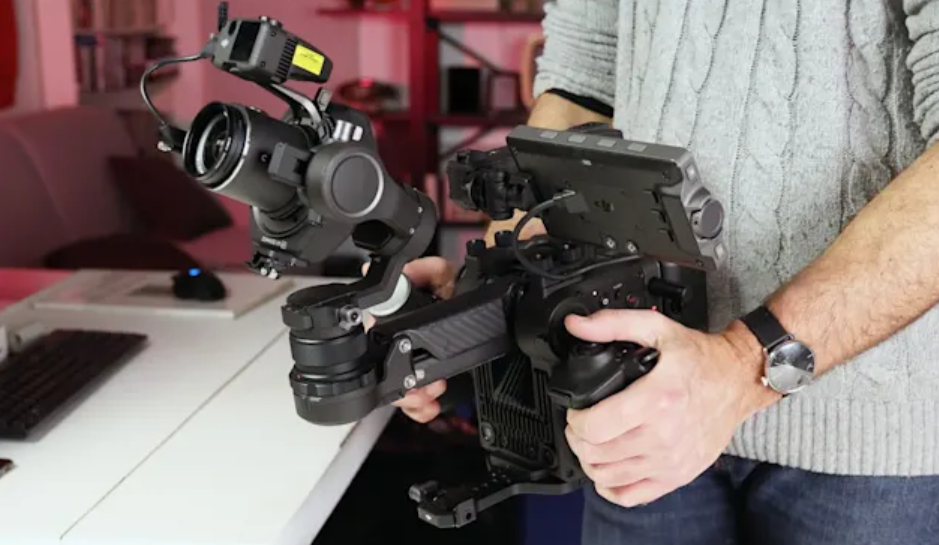
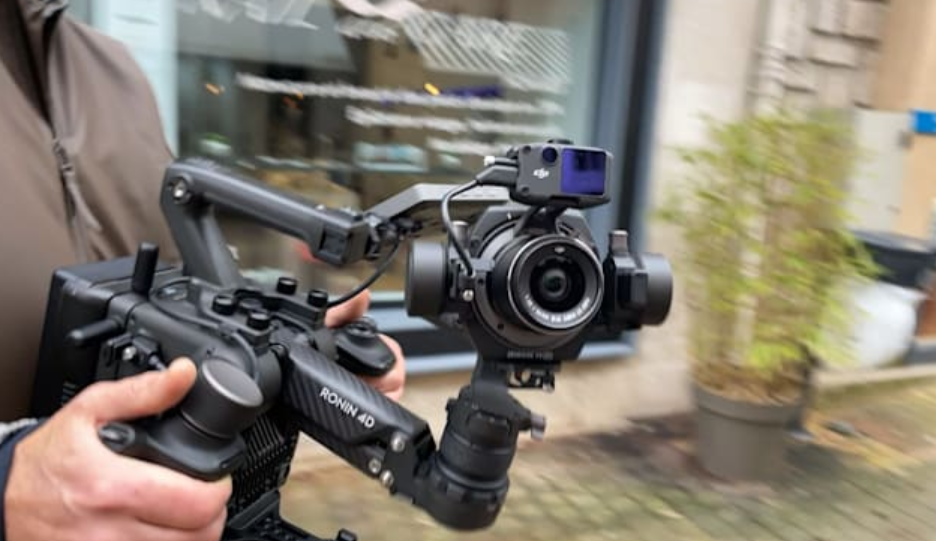
The main camera gimbal has three axes of movement with quick-release locks for swift balancing. The standout feature, though, is the Z-arm that gives it the “4D” name – one of the first on a gimbal, according to DJI. It uses an internal balancing system combined with multiple motion detection sensors on the front and buttons that help it smooth out walking, running or other jarring vertical movements.
On the right side of the body you’ll find HDMI, time code and DC power ports. On the left are switches to control power, recording, the main gimbal and the Z-axis, along with a multi-dial that controls focus by default. However, it can also be programmed for other functions like gimbal control.
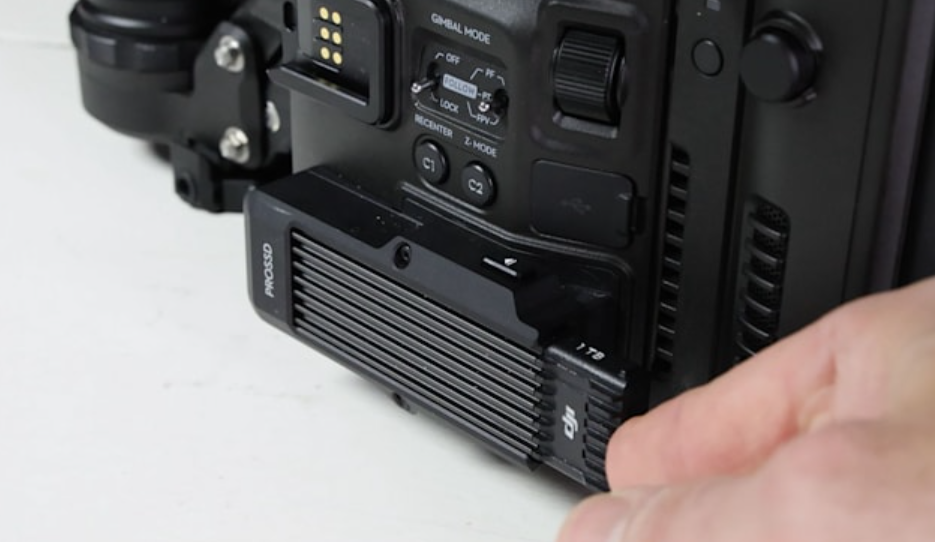
For storage, you can use either a CF express card, external SSD over the USB-C port (much like recent Blackmagic cameras), or DJI’s ProSSD module. The latter is a paid $799 upgrade, but required for high video frame rates. It’s nice to have the three options, particularly the external SSD, but you can only record on one of those at a time – so there’s no way to create a backup while recording.
The Ronin 4D has multiple removable modules, starting with the strong top handle. It’s a good way to hold the camera if you want a low angle, so it’s equipped with a rocker switch to adjust the gimbal (height only) and a button to put it in “sport” mode for quick movements. What it really needs is a record button, though, so you don’t have to reach around to the side.
Attached to that handle is the 5.5-inch, 1,000 nit display that’s the primary way to change camera and gimbal settings. It’s easy to adjust the viewing angle thanks to the nice friction mount, and has a super-logical menu system similar to the one on Blackmagic’s cameras.
It can be operated either via touch or with the 14 manual buttons and dial. Camera settings like f-stop and shutter speed are found along the top and bottom of the display. Power, media, gimbal and other controls are on the left.
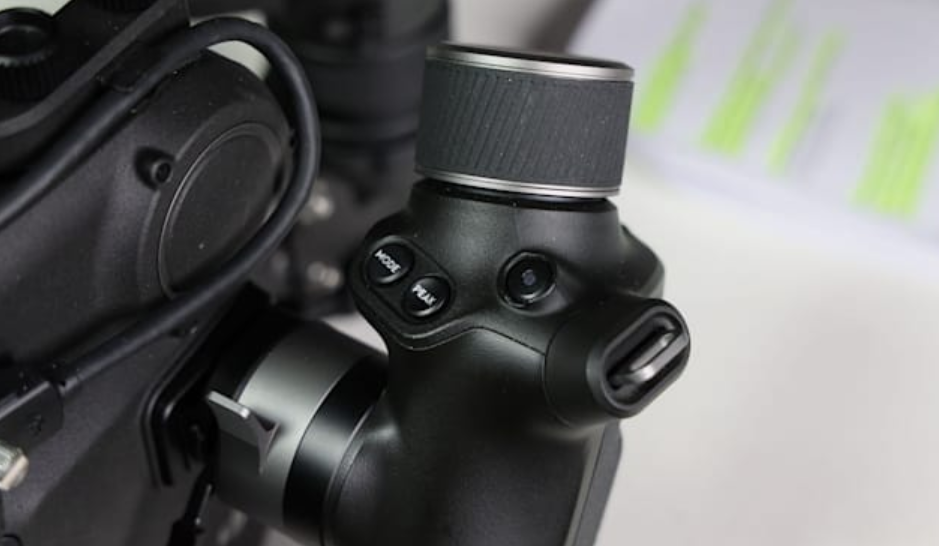
Next up are the camera grips. Both attach via a quick-release lever, and you can change the angle to adapt to your working style with another clever lever – even while you’re holding on to it.
The left grip has a joystick to move the main gimbal up and down or side to side, along with buttons for focus and gimbal tracking. The exposure button brings up the waveform, zebra and other tools depending on what you have selected, while the trigger button locks the gimbal or centers it with a double press. Finally, there’s another sport mode button on the inside of the handle.
The right handle has a large wheel that’s primarily used for focus, but also changes camera settings like the ND filter, shutter speed and iris when you hit the “mode” button. Doing that also ingeniously changes the wheel’s operation from smooth to “clicky” with distinct detents. It also has a focus assist button and AF lock button, while the trigger either locks the Z arm or activates/deactivates it with a double press.
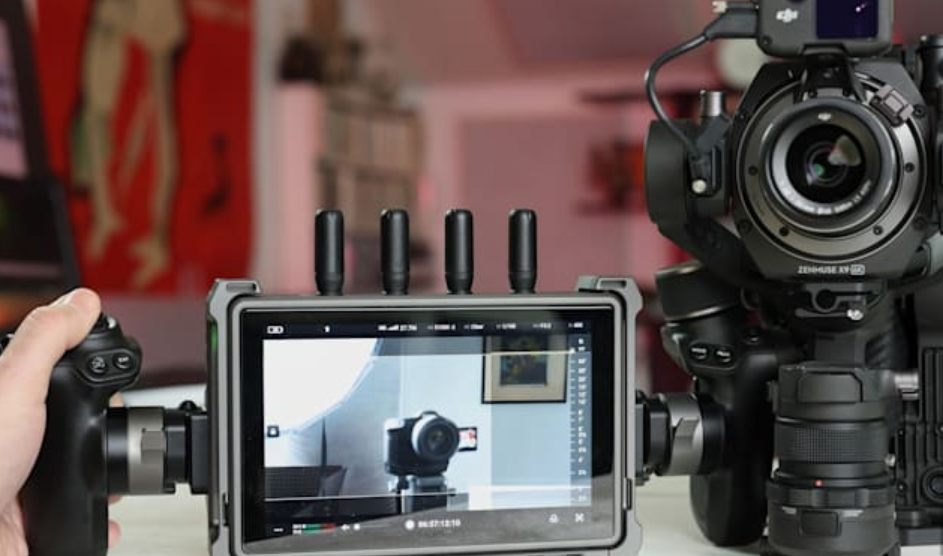
You also have the option to mount an optional $399 transmitter at the back. That relays video to the High-Bright 7-inch, 1,500 nit remote monitor that’s also optional ($1,699). It lets you not only view video but control many camera and gimbal functions from up to 20,000 away. To do that, you can remove the left and right grips normally used on the camera and attach them to the screen.
It can also record proxy video at up to 1080/60p via the built-in microSD card slot. Though that function was not enabled in my review unit. However, I was able to record video to an Atomos Ninja V recorder via the HDMI port.
Also at back is the battery plate that uses DJI’s TB-50 batteries. Those deliver 1-2 hours on a charge depending on operation, according to DJI. But I usually found they were good for just over an hour with active gimbal use.
Finally, the LiDAR focus module is attached above the camera and connected via a locking USB cable. With supported lenses, you get both autofocus and tracking – more on that shortly.
Operation
I pretty intimidated by all these features to start with, thinking it would a bear to learn the Ronin 4D. However, it was surprisingly easy to pick up the basic operation and then gradually learn the more granular controls. My photographer friends who helped me shoot the video found the same thing.
Balancing the camera is easier than on any gimbal I’ve tried, as everything is right there in front of you. You just unlock each axis one at a time, unlock it using the quick release controls and slide. The gimbal until it’s balanced. Once that’s set, DJI’s “autotune” feature takes care of the fine balance.
You can then turn on the 4D Z-arm for walking or other situations where the gimbal may bounce, but it’s by no means required for simple handheld operation. If you don’t need it, keeping it shut off will save you some battery life. If you do use it, you’ll need to balance for the smoothest operation. But that’s easily done via an on-screen guide.
The gimbal can set so that it always points the same way or (“locked”) or set in “follow” mode to smoothly follow the operator’s movement. In the latter mode, can set it follow only pan, pan and tilt, or pan, tilt and roll (FPV). The camera can manually tilted or panned using the joystick. Then centered using the C1 button or double pressing the left trigger.
The Z-arm has similar lock and follow modes, with “lock” keeping the camera in the same position. If you move the camera more than the arm’s range of movement, though, you risk smacking the arm against its top or bottom stops. “Follow,” again, allows the Z-arm to smoothly follow your movements.
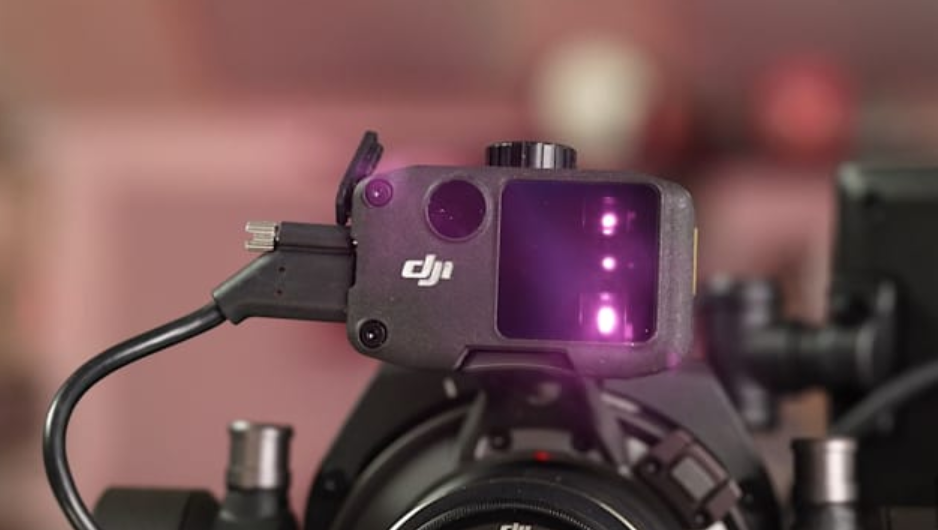
The LiDAR focus system is impressive, and could be something we’ll see on future cameras if they can shrink it down small enough. It works at a distance of around 33 feet by generating a real-time 3D point cloud.
You can choose between either manual focus, autofocus or assisted manual focus. AMF uses autofocus but also moves the manual focus dial. That way, you can take control by just grabbing the wheel, and give control back by releasing it.
There are three focus areas, or regions of interest as DJI calls them. The first is spot focus, the second is a wide box and the third is “smart” that detects faces or lets you draw a box to track objects.
Focus needs to calibrated for each supported lens, but once set up, it’s very accurate. Unlike standard autofocus systems, it can work in the dark. The biggest drawback compared to phase or contrast detect AF is that it focuses on the front of a scene, so someone’s nose might be in focus but not their eyes.
You can even set up LiDAR autofocus with manual focus lenses using the LiDAR motor kit. That would normally require a geared cinema lens, but the kit comes with a geared belt you can wrap around other lenses that don’t have that. I tested it briefly with a Sony 28mm f/2.0 lens (with the AF turned off) and found it was reasonably accurate, though it required multiple calibrations.
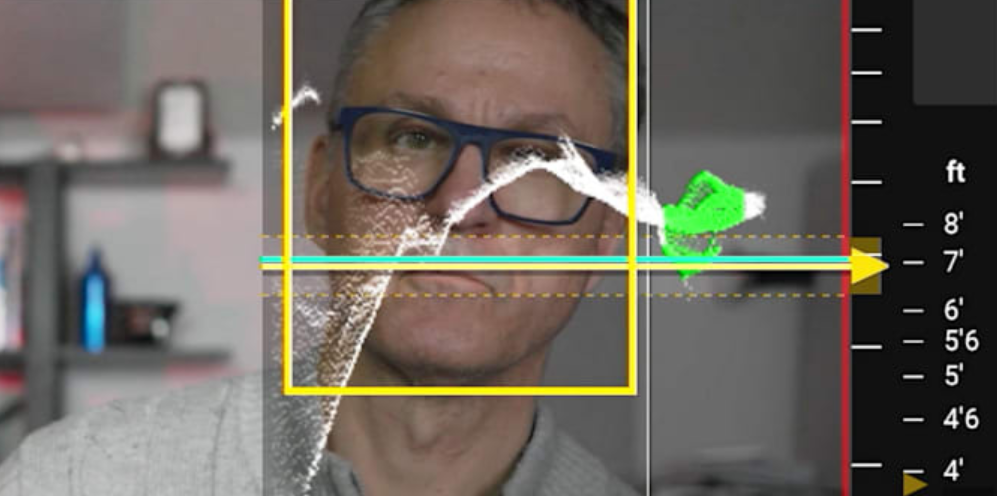
DJI has plenty of tools for manual focus, too, like peaking. But the best one is the LiDAR focus waveform that shows an object’s shape and distance. After some practice, I was wondering how I ever managed to do manual focus without it.
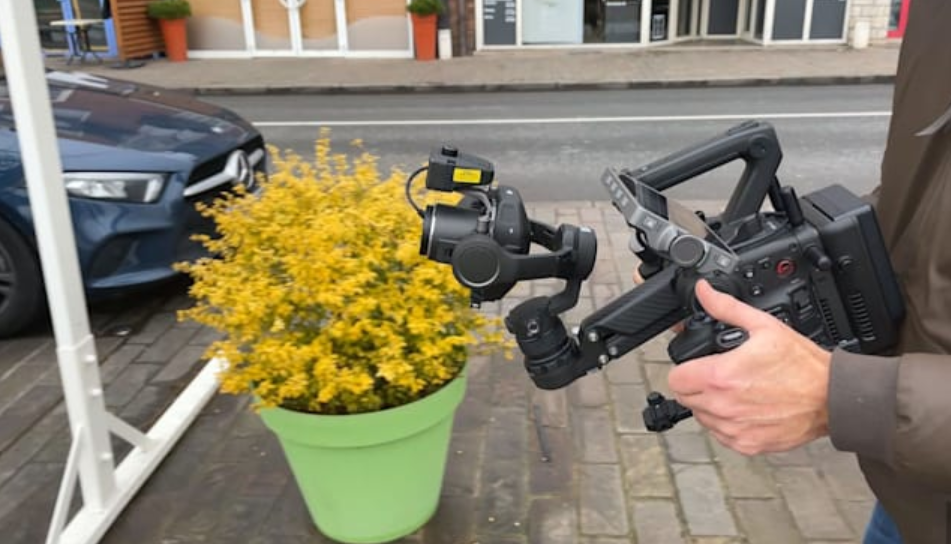
One of the coolest features enabled by the LiDAR module is ActiveTrack Pro, similar to that found on DJI’s Mavic 3 and other drones. That lets you lock onto a subject and have the gimbal track it while also maintaining autofocus. It automatically detects faces when in “smart” mode, and from there. You just press the track button on the right handle. That turns the yellow box into a green box, indicating that ActiveTrack is alive. You can track other types of subjects simply by drawing a box on them.
The feature works very well, keeping your subject framed exactly as you set it up. It tracks human subjects well even if you move behind or to the side of them. If something goes wrong, the framing can also tweaked manually using the left trigger. It can thrown if your subject moves too fast, though, as the camera can only pivot and tilt so quickly.
On the whole, the Ronin 4D delivers smoother footage than any comparable product I’ve tried – even over challenging terrain. The ActiveTrack Pro feature is particularly welcome, as it allowed me to take my eyes off the subject to see where I was going while still maintaining the desired framing.
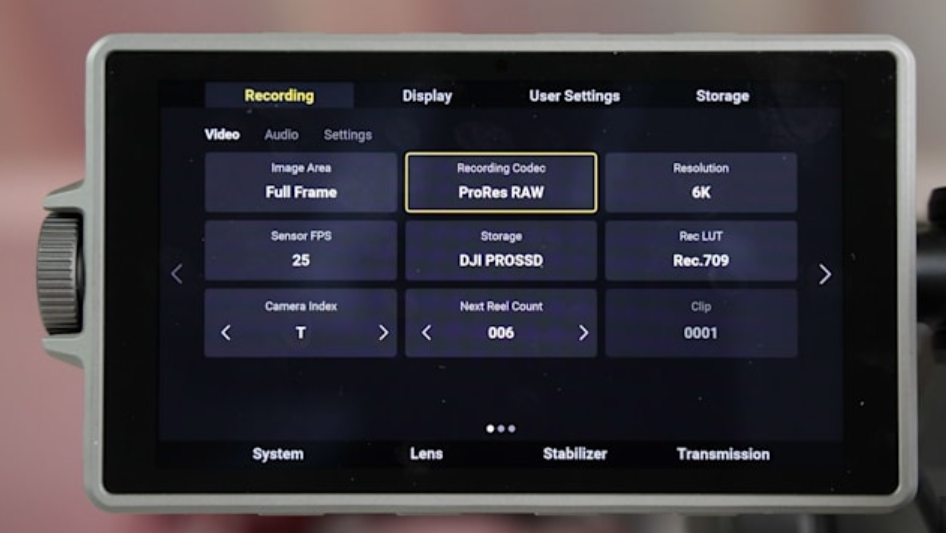
Finally, let’s look at the video specs and quality. Originally, the Ronin 4D announced with ProRes RAW along with ProRes HQ and H.264 10-bit recording. However, DJI announced that the RAW option would not be available at launch. Even though it worked perfectly when I tested it. The company didn’t say why, but the cinema camera company RED has a patent on that technology that all users must license.
Instead, it’s shipping with Apple ProRes 4444 XQ. That’s a very high quality codec, but it doesn’t offer the advantages of ProRes RAW – particularly the ability to keep the original, pristine sensor data.
Both ProRes options do deliver good quality, but also gobble up storage quickly. The H.264 10-bit option is more efficient, but not very edits friendly. So it would be nice to have something in between those.
You can record up to 6K at 48 fps or 4K at 96 fps using the full width of the sensor, in all codecs. Anything above that, including 6K at up to 60 fps and 4K at 120 fps will introduce a Super 35 crop.
The Ronin 4D’s 24.1-megapixel sensor has dual native ISOs at ISO 800 and 5000, with a claimed 14 stops of dynamic range. Image quality is right up there with other cameras I’ve tested lately, like the Panasonic S1H, Sony A7S III and Canon EOS R3.
In RAW mode with Log settings enabled, it delivers crisp, color accurate video that’s easy to adjust in post. It’s not quite as good in low-light as the EOS R3 or other recent mirrorless cameras. But video is usable up to around ISO 6400, up to ISO 12,800 if you’re careful with exposure. Beyond that, noise can get excessive, particularly with highly saturated reds and blues.
The biggest drawback with the sensor is rolling shutter. While it’s not worse than models with similar sensors like Panasonic’s S1. It’s excessive for a camera that’s designed for movement. Another current issue is audio, as the 3.5mm mic jack isn’t up to snuff for production needs. However, DJI is addressing that with an upcoming module with more production-friendly XLR inputs.
Considering that the Zenmuse X9 is DJI’s first full-frame camera, the image quality is shockingly good overall. It might even make sense for DJI to release the camera separately in some form, as the Ronin 4D form factor isn’t practical for non-gimbal shooting. That way, productions could more easily match up footage.
Wrap-up
In sum, the Ronin 4D is an impressive piece of technology that could change the way producers think about handheld shooting. DJI has created a new product class and invented technology like LiDAR-powered ActiveTrack Pro and assisted manual focus. At the same time, it delivers full-frame image quality with no compromises, apart from the rolling shutter.
So is DJI the most innovative camera company right now? I haven’t seen anything else that can match the level of technical innovation on the Ronin 4D. It’s even hard to compare the Ronin 4D to other products, because it essentially has no peers. And for a first-generation product, the design and build quality is astonishingly good.
With a $6,800 price tag (and more like at least $8,000 properly kitted out). The Ronin 4D is a pretty niche product – though it’s easily worth that price. Even if it doesn’t sell widely, though, it’s a technical tour de force that has put other camera manufacturers, cinema and otherwise, on notice. If DJI keeps innovating at its current pace, that sleepy world could get a lot more interesting.